Create a Board Section on Pinterest: If you want to keep Pinterest Pins well organized in boards, then you should create a Pinterest section and put Pins in this section.
You can create many types of Boards as per your convenience and keep the related Pins in these Boards and you can find the Pins easily when needed. You keep putting Pins related to the same subject in the same Board and their number becomes in hundreds.
Now suppose, there are many Pins related to the same topic but there is some difference between them then they need to be rearranged.
For example, you have created a Board related to food recipe and you put different types of food recipes Pins in this Board, such as Roast chicken, Stuffed chicken breast, Macaroni cheese etc.
So, if you do not arrange these Pins, it may take a lot of effort to find any of the Pins. To find any Pin, you will have to scroll to see all the Pins and then you will get the Pin which you were searching.
This social media platform understood this problem of users and added another feature in 2017 called Board Section.
In this article, we will explain that how to create a Board Section and add Pins to it.
But, first we will know what is a Board Section in Pinterest.
Read also:

What are Pinterest Group Boards and How to Create them

4 Easy Ways to Find Best Pinterest Group Boards and Join Them
What is a Board Section
Let us take an example to understand the Board section.
To organize the files on your computer, you put all the files related to a topic in a folder and give a name to that folder.

But sometimes you find that some of those files are similar, then you create many more folders in that main folder and keep their related files in them. You can also call these folders as sub-folders. You can organize your files by placing them in these sub-folders and they are also easy to find.
Similarly, Boards are created to organize Pins in Pinterest.
These Boards are also related to a niche i.e. subject. In these Boards, you keep and organize the Pins related to the same niche.
This makes it easier for Pinterest users to find their Pins.
Hence, a Board Section in this main niche is like a small Board with sub-niche.
You can think of a Board as a folder with a main niche and the Section inside it as a small folder with a sub-niche.
For example, you have created a Board related to a niche i.e. the topic “Chicken recipe”. Now you put the Pins in this Board related to Roast chicken, Stuffed chicken breast etc.
Now suppose you have put 10-12 Pins related to all the above topics in your Board, then you can arrange them again and put them in that main Board itself by making small Boards or sub-boards and you can say these small Boards as Sections.
The main advantage of creating Section inside a Board is that you can easily find them.
When your boards don’t have too many Pins then you don’t have any problem. But as the number of Pins increases and the number of Pins becomes hundreds or thousands, it becomes very difficult to find Pins related to any one topic.
In such a situation, if you put them in sections according to the topic, then you do not have any problem in finding them.
How to Create a Board Section or add section to Pinterest Board
Here we’ll explain how to create a Board section in both the web version of Pinterest and the Android app.
To create a Board section in the web version of Pinterest, follow the steps given below-
Step-1- Open Pinterest website in browser and login to your Pinterest account.
Step-2– After login, click on your profile picture in the upper right corner of the homepage. This will open your Pinterest profile.
Step-3- Now click on the board within which you want to make the section. Clicking will open that board.
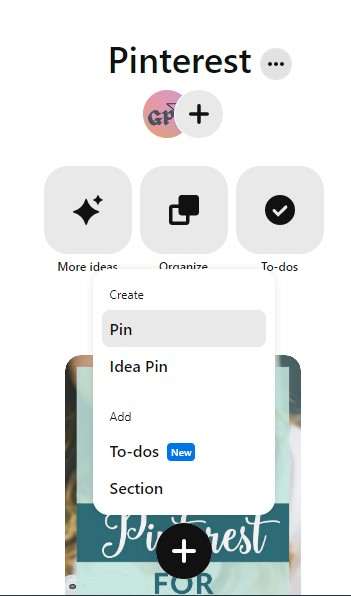
Step-4- Now click on the plus icon which appears at the bottom of the screen.
Step-5- Here you will see many options. Click on the ‘Section’ option.
Step-6- On clicking on the section, a text box will open to name it. After typing the name of your section in it, click on Add.
In this way you can create a Board Section on desktop i.e., a web version of Pinterest.
Follow the steps given below to create a Board Section in the Pinterest Android App–
Step-1- Open Pinterest app on your mobile phone and login to your Pinterest account.
Step-2- After login, click on your profile picture at the bottom right corner of the screen. This will open your Pinterest profile.
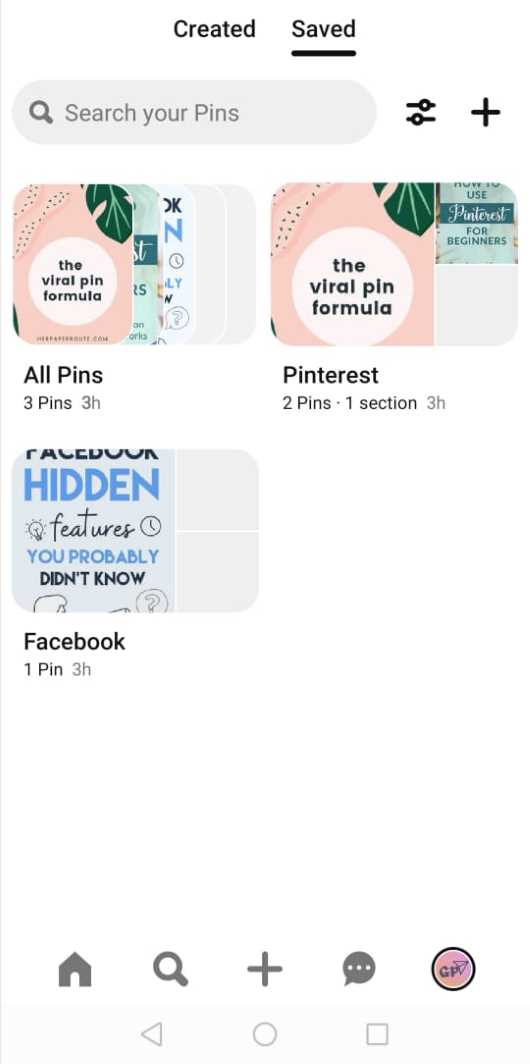
Step-3- Now tap on the board inside which you want to make the section.
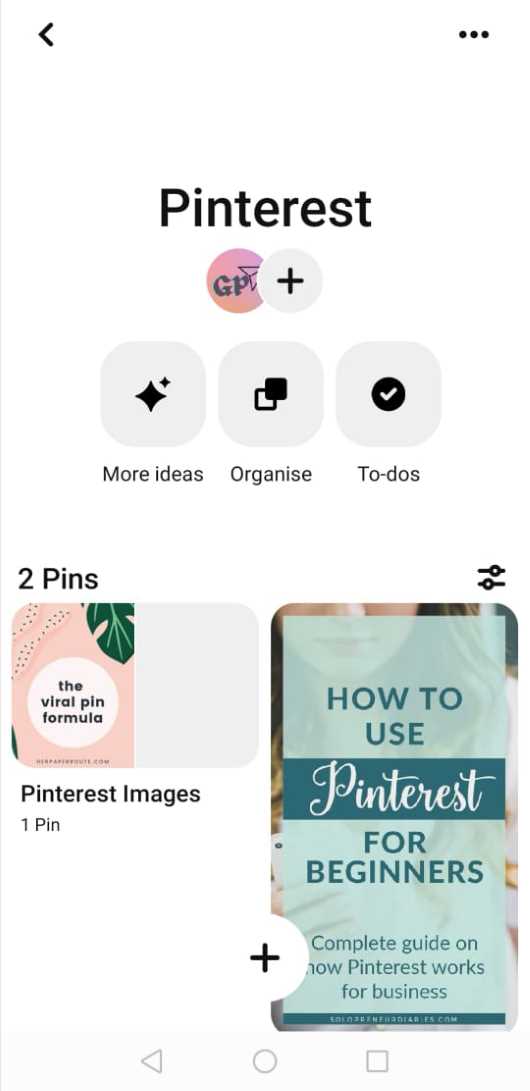
Step-4- Now tap on the plus icon which appears at the bottom of the screen.
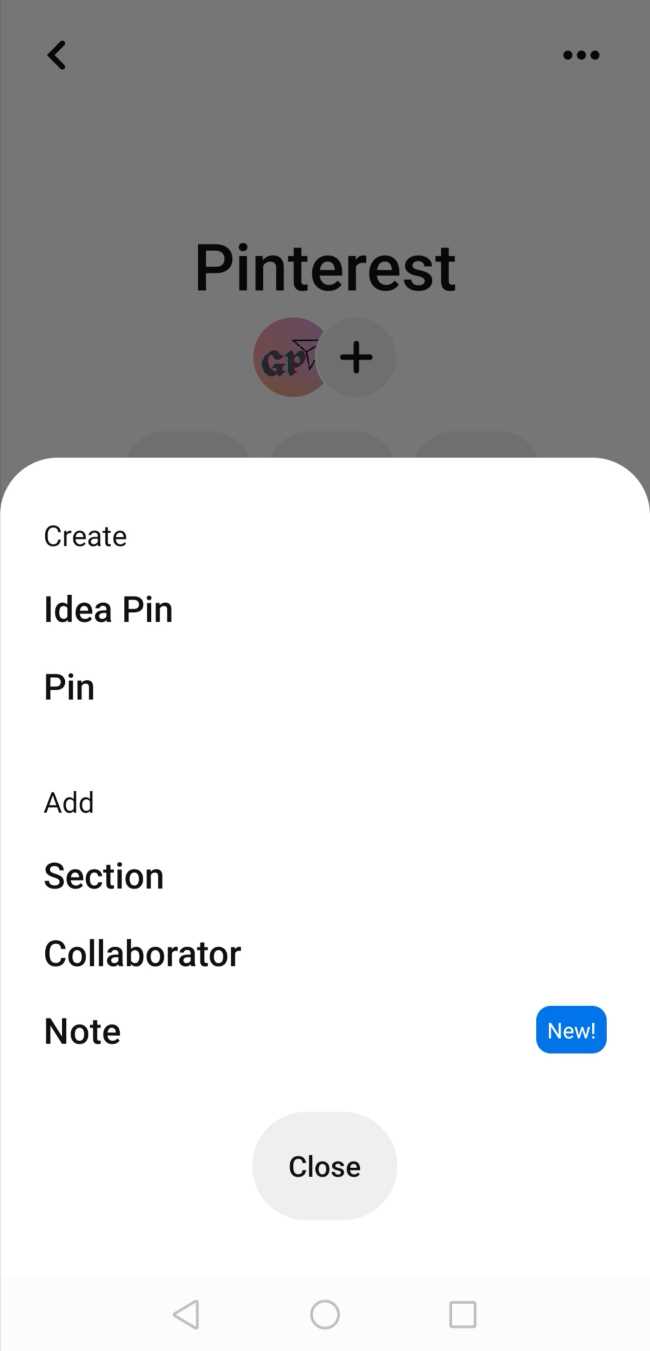
Step-5- Some options will appear as soon as you tap. From these, tap on the option of Section.
Step-6- Now name that section and tap on Next button.
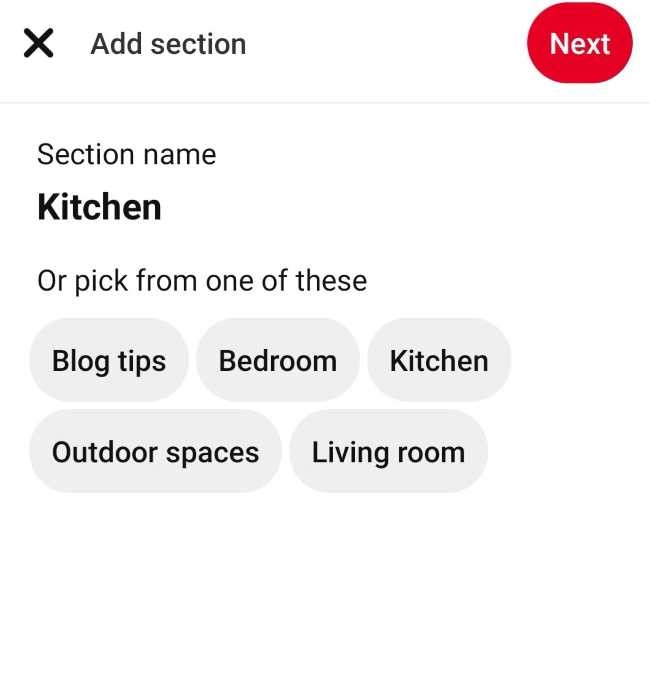
Step-7- As soon as you tap on the Next button, all the pins of that board are visible.
If you want to put some of these Pins in the created section, then select them by tapping on these Pins and then tap on the Done button in the top right corner.
If you do not want to put any of these Pins in that section right now, then tap on the Skip button in the top right corner.
Add Pins to the Pinterest Section
After making the section, now it is the turn to put pins in it.
For this also there are different methods for web browser and mobile app. We will talk about both of these methods here.
Steps to be followed in web browser–
We are assuming that you have already created a Board Section and want to add a Pin to it. So for this follow the steps given below-
Step-1- Login to your Pinterest account in web browser.
Step-2- Now click on the board in which the section has been created.
Step-3- You will see that the section created by you is just above all the pins of that board.
Step-4- Three options appear just below the name of your board. Click on the option of Organize among them.
Step-5- As soon as you click on the option of Organize, all the pins of that board become selectable.
Step-6- Now select from these Pins which you want to put in the section by clicking on them. If you want to select all the pins, then click on the button of Select all made on the right side just above the section.
Step-7- As soon as you select Pins, the three icons at the bottom of the screen get highlighted.
Step-8- The first of these icon is of an arrow which is used to move the selected pins. Now click on the icon of this arrow to move the selected pins in the section.
Step-9- As soon as you click on this icon, apart from that board and the sections made inside it, other boards also appear. Click on the section in which you want to put Pins.
As soon as you click, the Pins selected by you go to that Section.
To put Pins in the Section using Android app, follow the steps given below-
Step-1- Login to the Pinterest app of your mobile phone and tap on the profile picture at the bottom right to go to your profile.
Step-2- Now tap on the board in which section of the board you want to enter Pins.
Step-3- Sections already created by you of all your Pins appear as soon as you tap.
Step-4- Now tap on the option of Organize from the options given below the name of the Board.
Step-5- Here you start seeing all the pins. Now you can select them. Select the ones you want to put in the section.
Step-6- As soon as Pins is selected, some icons at the bottom of the screen get highlighted. Tap on the first of these icons.
Step-7- Now along with the section made in this board, other boards are also visible. Tap on the section in which you want to enter the selected Pins.
As soon as you tap, the selected Pins are added to that Section.
In this way you can easily put all the Pins of that Board in the Section using web version and android app of Pinterest.
Merging two Board Sections of the same Board:
For some reasons, if you want put Pins of two Board Sections in one Section, then you can follow two methods.
The first method is to move Pins from one Section to another Section of the same Board. This method is very easy to keep Pins from two Sections in one Section.
By using second method, you can merge two Board sections and make them one. To merge two Sections of same Board you have to follow the steps given below.
Step-1 – After login to your Pinterest account, click on your profile picture. This will open your Pinterest profile.
Step-2 – Now click on the board whose sections you want to merge.
Step-3– After clicking, you will start seeing all the sections of that board. If you want to merge this section with any other section, then click on the first one. In this way that section will open.
Step-4– Now click on the three dots beside the name of that section and then select the option of Edit section.
Step-5– Now you will see some more options. From these, click on Merge option.
Step-6– Now a drop down menu Pick a section will appear on this page. Click on it. By clicking, all the sections of that board are visible.
There is also a search box where you can easily find it by typing the name of Section.
Step-7- Now click on the section with which you want to merge.
Step-8- Once clicked, the button of Move Pins and delete section gets highlighted in that lower right corner. On clicking this button, one section gets merged with the other section.
After getting merged, all the Pins of the one Section are shifted to the second Section and the first Section gets deleted.
Conclusion:
In this article, we explained what are Pinterest sections and how they are created. As well as how pins are put in them and how they are merged if needed.
According to experts, the Pinterest section has no role in the SEO of the Pinterest account.
Still, sections are helpful for organizing the pins placed in the board. Organizing Pins in the language of Pinterest is called Cleaning the Board.
In this way, these Pinterest sections are also helpful in cleaning your board.
Creating a Pinterest section is optional and is a matter of personal preference and not of necessity.